High Frequency Words

Let's talk high frequency words! or sight words, popcorn words, star words.... or whatever you call them! In my room we refer to them as "Fish Words."

They are important and they are in the Common Core Standards. To quote, in the kindergarten standards it says:

CCSS ELA-LiteracyRF.K.3c Read Common high-frequency words by sight (e.g., the, of, to, you, she, my, is, are, do, does)

Some people will make a distinction between sight words versus high frequency words. So it may anger those people... but I use the terms interchangeably...don't be mad, please!

My school district has a list of 50 high frequency words. The idea if for the students to know 25 by the end of kindergarten and all 50 by the end of first grade.  We work hard so that most of them do leave kindergarten with all 50!

So let's get down to the real question..... what do you do for your students to learn these words? Here is my Top 10... but still not complete....list of fun ways to learn the sight words- unlike David Letterman's Top 10, these are not listed in any particular order:

1. My favorite tool is Heidi Butkus' Sing and Spell CDs... oh my word! The kids just L-O-V-E these songs! There are several volumes of CDs- I think I own about four of them. I have made this book to go with the songs:

2. Another thing I do is each time I introduce a sight word (once a week in the beginning of the year and then twice a week) we vote on a symbol to put around that word. The few first words I always make the decision (a rectangle around "the" and an arrow that can "see" both ways under see) After that, the kids vote. I post them on the wall. This picture if from early in the year:


Here is last year's popcorn version:


I used to buy cut outs to write the words on (like the popcorn pieces at the top for decoration) Now, I just die cut them or trace from one set of the bought version and cut out the others to save on money. I used to try of a way to make this cuter and do it on the computer with one of the fonts I am obsessed with.... but I think it is best keeping it "old school" and just hand writing these.

Sometimes the kids will suggest something like "a unicorn" and I have to guide them to make another choice since they would be too tricky to draw all the time.

When do the kids use these symbols? ALL THE TIME! When they get any paper or make a class book the first thing they do is be a "word detective" and hunt down these words! We have a long talk about not writing in library books, but other than that, anywhere they see a "fish" or "popcorn" word they need to put the correct symbol.

3. I have a center for early finishers where they get to practice the words we have done so far. They love doing this.


Sometimes I run off a bunch just to have ready and then if we add new words before I make a new set then they can just add them to the paper (like how "you" is added to the top one.)

4. We stamp the sight words - on paper or on our hands! (2 or 3 letter words fit a bit better)


5. I will use these "magic tubes" (they are test tubes I order from Steve Spangler Science). I've seen other teachers do this same concept with sand instead of water. Can you "see" the word "see"? Why is there glitter floating in that water? It's a short answer: because glitter is fun!

 I sort the letter beads in a box I got from Michaels. There are 2 letters per section, although I will say that putting "E" and "F" together wasn't the best choice I've made:

6. We play a game where we write the "fish words" on a neighbor's back.  In the beginning of the year I do this same concept with letters and numbers. They know who their carpet partner is and sometimes when the phone rings or another adult comes in the room for whatever reason I just say, "Turn to your carpet partner and write a fish word." Then the other person has to guess the word!


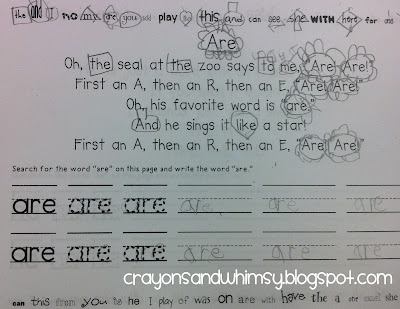
7. Sight Word Search - Well, let me say that getting the highlighters out is a BIG deal in my room. Why is it so exciting... I guess I too like to highlight with multiple colors. This is done with an adult and a group of about 6 students. They each start with one color highlighter. The adult announces the word to search for and they look for that word in each column. They have learned the words "row" and "column" and are good at searching. We all pass the highlighters to the right and get a new word... etc, etc.


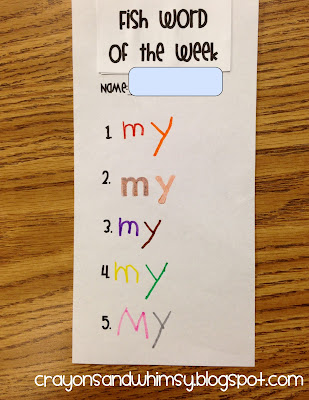
8. And then there is this super easy-peasy idea. We have been asked to use less paper- our budget has been cut and so that means less copies! So this little idea is great because it is 1/3 piece of paper per child. And to be honest- you could probably do it just as effectively without photocopying anything at all. I write the fish word/ sight word...whatever you call it.... 5 different ways... some weeks with markers, sometime with colored pencils and usually at least one line of the letter stamps. The students have to just copy the word to look exactly like mine. EASY! and great practice for them!

 Usually my sample (the one to the right) has to be on display, but this little friend takes it down.... problematic if another child wants to use this center... but worked out better for the picture.


9. Another fun game is "Fishing for Sight Words" and it is available at my Teachers Pay Teachers store:

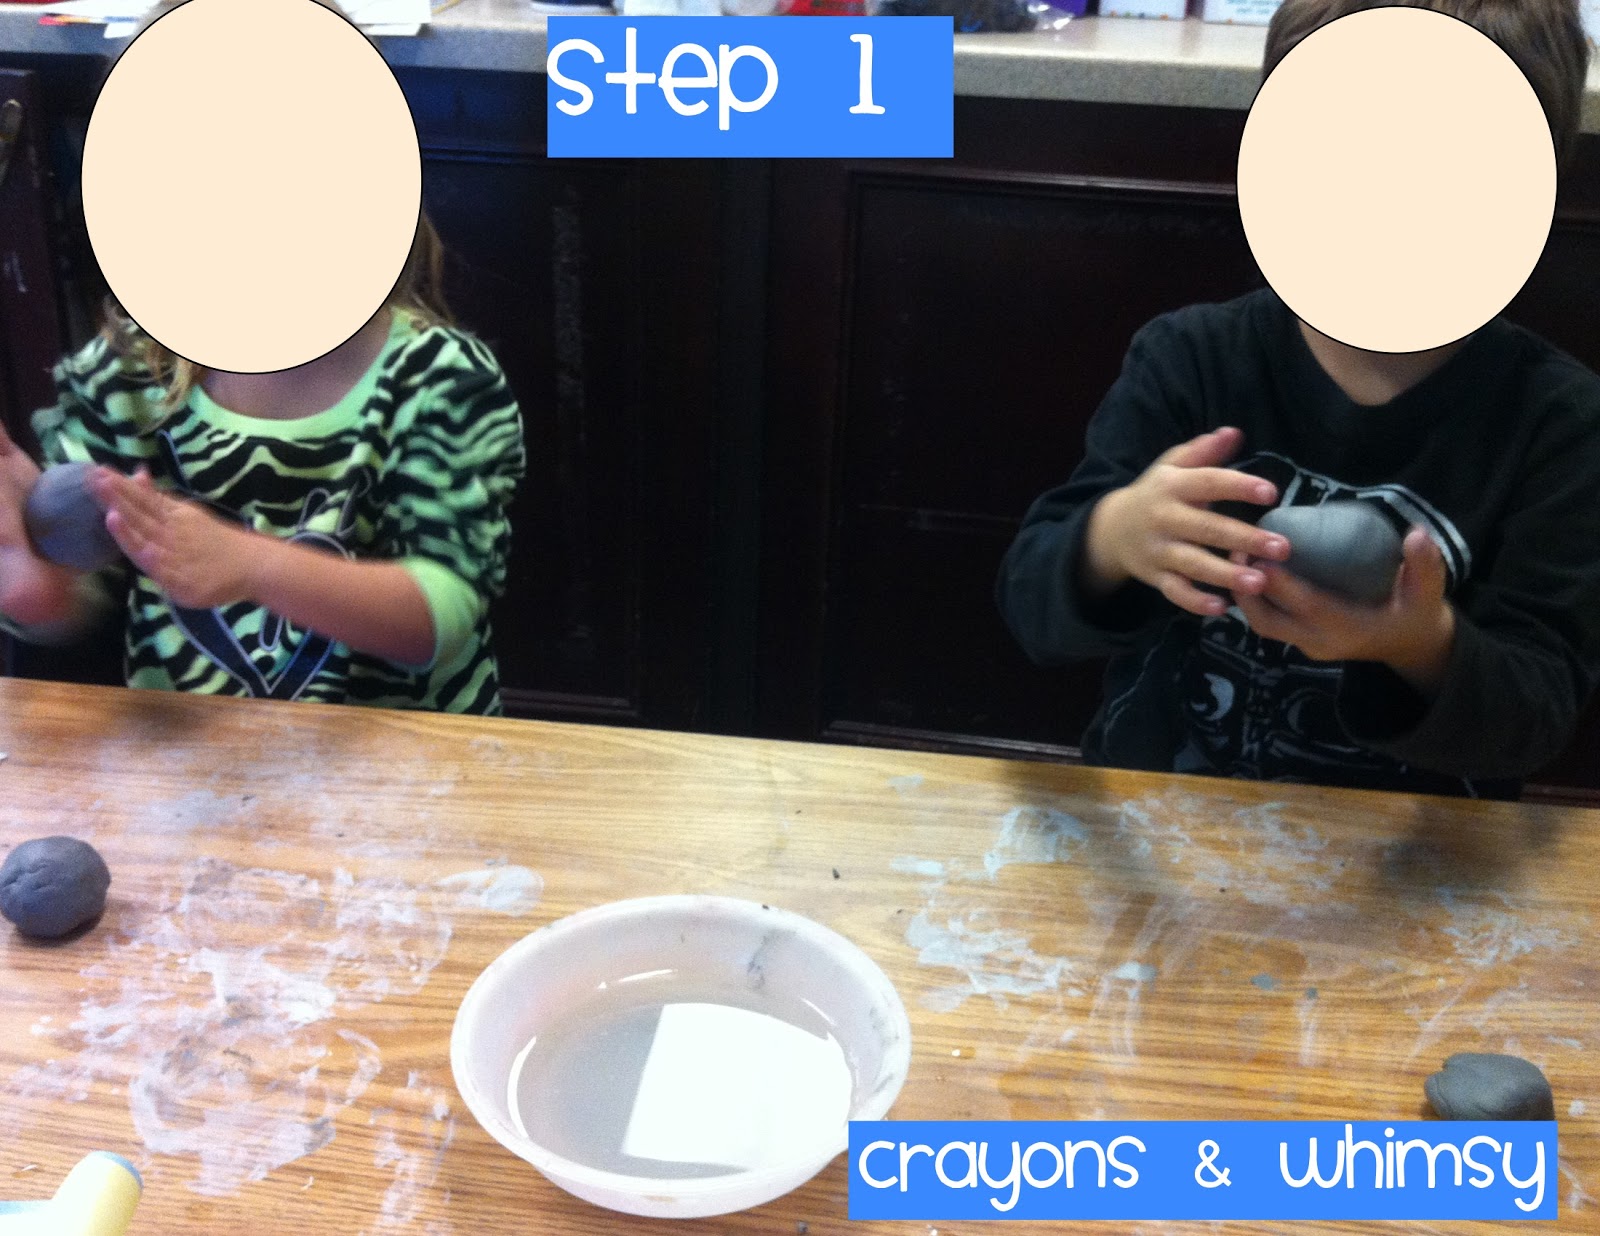
10. Play dough! No pics of this one! But we roll the play dough in spaghetti strings to spell out the words. And I've been eyeing {THESE} at Lakeshore for a while.

What do you do to help your little ones learn sight words?
3

February Calendar

T-minus 3 days until February! How did that happen?

Each month I make a calendar with my kiddos. It is a great way to kick off the new month and to practice math concepts in the common core...numbers 1-30 (or in this case 1-28), calendar concepts...and I like to throw in a little patterning!

This month is one of my favorites because it is all about love. We learn how to say, "I love you" in many languages, including sign language.

We'll be making a circle map with "I love you" in the center and then all the ways to say I love you around the edge. I like to have my little ones go home and ask their families if they know any other languages and we get to learn more about the cultures and families in our room. It can also be a great way for my little second language friends to be the leader.

Here is a close up picture of what the finished products will look like.
(It's not as fun when you see my sample...but my little friends haven't made theirs yet!)
2 versions.... just to mix things up a bit!


I just posted the this fun craftivity on Teachers Pay Teachers. Check it out by clicking on it below.


0

Five for Friday

fiveforfriday

I'm linking up with Doodle Bugs Teaching for the Five for Friday.... or in my case Five for Sunday. I started a draft of this on Friday... does that count for being on time? 

This is where I share 5 random things from my week.

1. On Monday...MLK holiday...my husband and I were driving back from Vegas. We stopped at the outlets at the state line and did some serious damage. The January sales are just too good to pass up!
Nike gear:
My favorite Banana Republic purchase:
Other cute stuff from BR....that really doesn't look that cute in this picture...but it is:
Funny side note: as we were leaving I said to my hubby.... "that was fun, popping tags" because I thought that song on the radio (which I don't know its name or who it is by...just one of those that you hear often) was just about buying lots of clothes...aka what we had been doing. It was then explained to me that the song is about shopping in thrift shops and swapping out the tags for cheaper prices....."Oh," I said. "Did you switch tags out today?" he asks me, fully trying not to laugh out loud. "No... and clearly I'm not as hip with the urban lingo as I thought I was."


2. For the first time I used Adventure to Fitness in class. I learned about this from DeeDee Wills. It is a FREE resource to get your little ones more active. This week we did the "Arctic Freeze" and it was our job to save some citrus fruit. It was 30 minutes of physical fitness... with learning about the Arctic built in! I plan to use this weekly- the kids were IN TO IT! BUT I will say, toward the end they were having trouble keeping up with Mr. Marc. That was a reality check...


3. On the fitness note..... I am one week away from my Color Run (one of my New Year's Fitness Resolutions {Click Here} was to run again) This is just a 5K run that is all about having FUN so I thought it was a good one to start 2013! I bought these new "kicks" (testing out that urban lingo again) this week to help me get ready..... but I won't dare wear them in the run itself and get them all dirty! 

My husband marched me down to the running store for a full gait analysis. They watch you run, have you stand on this machine that tells about your arches and where you apply pressure when standing. Then they tell you what type of running shoe is best for you. My results were boring: neutral running style and medium arches. But apparently that is a good thing. And apparently I put a bit too much pressure on the top of my foot. I tried on about 30 shoes! And these Mizunos were the winners:
and check out the cool little Japanese writing!

4. My little ones finished their clay snowmen! This has been a process since we got back to school in the beginning of the month. I love them! Click {HERE} to see my blog post earlier in the month. This helps with fine motor skills, covers our science standards as well as language arts since we were writing all along in the process. Plus, they are just so cute and kindergarten!


5. Last but not least, I finished my Valentine Unit this week. Yay! I am also just about finished with a February Calendar that I will post soon. It always feels good to complete a unit!


Cheers to a great week! I hope this next one is filled with just as much learning and fitness... and a little less shopping :)
2

Mittens and Hats!

This is the time of year that we read The Mitten. I love that folktale and of course, we read Jan Brett's version of this Ukrainian tale. My little ones got to sew their own mitten (I chose purple rather than the white that Baba uses in the story). Then they each colored and cut  all the animals found in the story.


We practiced retelling it to see who would be able to put all the animals in the correct order. Spoiler alert.... they all can do it! They love the story so much there is no question that the mole comes first, etc, etc. Some of them used the book to make sure they were correct.

Time to retell the story putting the animals inside their mitten:
I glue a note on the mitten for the parents to understand what we have been working on:
Next we read The Hat. Another great one... On Jan Brett's website she has puppets available for all the characters in The Hat. {Click Here}.

We compared and contrasted the two stories using a Double Bubble Map:

Usually when we make charts or do shared writing I share the pen with my little ones, but because we are new to the double bubble and the spaces were small I did the writing this time and I hate to admit it, but I also drew the sorry excuse you see for a mitten and a stocking. I purposely used blue and red for the things applying to one story and then purple (which is made by combining red and blue as we learned in science not to long ago) for the facts that are about both stories.

The first thing added to this chart was "Both stories have a hedgehog!" And funny enough, I was able to tell them that Jan Brett has a hedgehog for a pet! Imagine the looks on their faces. And if you are wondering, I learned that on her website.

Next week we will do a story analysis of The Hat.
0

Valentine's Day is on its Way!

January is flying by! I feel like we just got back and yet somehow February is only 8 days away!

I love Valentine's Day- not so much in my personal life... don't get me wrong, my sweet husband takes good care of me. But what I really love is all the shenanigans at school to pass out Valentines. I can remember the excitement of it all when I was little and now I just love watching them! I set up a post office in my classroom and beginning February 6 we will be "mailing" our valentines to each other. I will blog about my "post office" soon!

I have been working on my Valentine unit for quite some time now.... I think you'll love the Valentine Lion craft. The perfect card for your little ones to give to their parents!

For language arts there is a rhyming words book, Valentine word bank, sight word game, print concepts and more! There is patterning, measuring, addition, numbers 1-30 including more than and less than in the area of math.

If you want to check it our please just click on one of the images below:


I am going to be posting more about Valentine's Day soon.
1

Happy Birthday Dr. King!

How nice it was to have a day off today! On Friday my husband and I decided on a very last minute trip to Vegas! Let's put it this way- I was booking our hotel room as we were on the 15 freeway in the middle of nowhere! It was so nice to get away and having that extra day made it possible! Stopping at the outlets on the way home was also fab-u-lous!!  The last time I was in Vegas was July for the Kindergarten Conference.

Okay... let's focus here....On Friday my class and I read books about about Dr. King. We had a long discussion about him and his message.  "The Catch of the Day" (in my ocean themed classroom this is the person who is my helper for the day) got to make arbitrary rules when dismissing the others to recess. She announced, "anyone wearing blue can go to recess." (Don't worry- I promise everyone got a recess that day!) But we talked afterwards about how unfair that would be if differences allowed some people to have more rights than others. I still have trouble understanding how any of this actually happened, but the kids just go into shock when they hear about segregation.

We then made the TLC Dr. King. This is one of my favorites!!! I love how all the kids do the yarn hair in a different way and it is just "so kindergarten" for lack of a better term.
Kaye Espinosa from TLC Lessons does some great work. The MLK project comes from her Winter Book. Click {HERE} to go to her site.

Tomorrow we will be writing, "I have a dream...." and later in the week we will be reading Todd Parr's book, "It's Okay to be Different." He says, "It's okay to dance by yourself" which is good news for me. Another quote from this fun book is, "it's okay to wear glasses" which I think hits home for many of the little ones in class.

I found this free writing page on Kelley's blog, Teacher Idea Factory. Sorry I only have my sample to share..... but my little guys haven't completed theirs yet. (What I wanted to write is: "It's okay to watch The Bachelor" ..... which is what I will be doing any second now... but really, is it okay?) What I actually wrote is "It's okay to talk to yourself" because I DO IT every day and my little ones hear me. So I think they will get a kick out of it.


Have a great short week!

1

Snowmen Made of Clay

Brrr! It has been cold this week.... but I am talking cold for California. Still it has been in the 50s and dropping to the 40s at night! That being said, the sun is out and there isn't a drop of snow anywhere.... about half of my class has never even seen snow.  That doesn't stop us from talking about it in class!

Since my little ones can't make real snowmen- we make a "clay snowman." One of my students pointed out, "shouldn't they be called claymen." Wow! That is a great point!

First, we sing Heidi Butkus' song "Let's Build a Snowman." It is on her Little Songs for Language Arts CD. I love this CD! Each student makes their own book. Here is half of the song:

That is my sample in the pocket chart ...I meant to take a picture of the kids' books! If you get Heidi's CD she gives you directions to create books for every song. In an effort to be more  green my class made half size (6x9inches) books (where as the sample above is 9x12inches)

We then also are in the process of making a clay snowman. I use a soft molding clay that can air dry. All clay is different so I would suggest making your sample snowman first to be sure my directions will work for you.
Step 1: Have the students roll 2 balls of clay.
Tip: Divide the clay into giant balls ahead of time and put in zip lock bags (if you won't be using the clay soon then wrap in a wet paper towel.) I use string to cut the clay up. The little ones get one ball to pull apart to create both the body and the head. 
 Step 2: This step is key!! Both the head and the body need to be scored! I did this for the kiddos this year because last year we had a few headless snowmen, which can be traumatic, but nothing a glue gun can't handle! So this year I scored them to make sure the lines were deep in the clay. Place the lines perpendicular to each other and have the kids push them together.
Step 3: Students dip their finger in water to smooth the surface. Be sure they spend quite a bit of time where the head and body connect. 
Step 4: Using a pencil and/or paperclip (as you can see I don't own professional clay materials... just classroom materials!) add the name, year and also the face (for to get a pic of that!) Students can do this right away or wait a few hours for the clay to be less wet. You could even wait one full day!
Step 5: We wait and we wait! I don't use a kiln. I let the clay air dry over time. I've also read it is a bad idea to put the clay in a regular oven because A. it could let out toxic fumes and B. it could crack the clay. It works out better to leave the clay out and allow the kids to observe the slow change from wet to dry. I usually wait one week for them to be ready to paint.

We had a discussion about how the clay changes. Our science standards have us look at clay, wood, metal, paper and the characteristics of each. This year we looked at the wet and dry clay side by side:
They were so into it that I decided I should be writing this out and grabbed my chart paper...... and that explains the not-so-cute venn diagram about wet clay versus dry clay.
We also wrote out the steps it took to make the snowman. Since they were experts at the "Let's Build a Snowman" song it made this easy. Here is what we came up with:
Since there is a week long wait to paint them and finish I decided not to worry about that part in our writing. We may write again when it is all said and done!

I will post a picture of the finished product soon! Here you see them with the first coat of paint that we did today. I even have small plastic hats for a finishing touch! I can't wait!
Happy Friday!


UPDATE: We finished our snowmen! I wanted to post a picture. We added black hats and buttons. Some chose buttons and others sequins! The little ones took their clay snowmen home along with their mini book "Let's Build a Snowman!"

Oh, one last thing: The snowmen hats are 19mm x 11mm black hats. I got them {HERE}
2

A Tiny Bit of Help for Mac Users Trying to Flatten a PDF File

This is just a tiny bit of help...because that is all I can offer you...... Last November I read the post by the 3AM Teacher, Michelle, on how to flatten and secure PDF files. I had heard the term "flatten" before, but just like I can't seem to flatten my stomach... I didn't understand HOW to do this. I am a Mac user and so some of Michelle's tips don't work for us....if you are a PC person - go to her site NOW - click her name above! For Mac users... also go to her site, because she has such great stuff....  plus she also found this great link that DID explain how to convert a Pages doc into a Jpeg.... which is great... but then I was like...now what?!

Let me back up a little bit - and explain the WHY of this whole thing! When you convert a document to PDF it does not secure the content in the file.... did you know that? When you are posting things on TpT or other sites you want to make sure your files are secure.... In fact, if you read the terms and conditions of some of the clip art you may be using you will notice that you are supposed to be doing this!

My favorite comment that Michelle wrote was about how some people on those Apple forums write things that make no sense... I was glad to read that a techy person like her found some entries to be frustrating.... because I often am searching for answers and read these forums that just confuse me more!  So I want to share my 2 cents, without being "one of those people" and causing more harm than good because I am NOT super talented in this area.

After you have created your fabulous files you should follow these steps:

Go to this link (found by 3AM Teacher, Michelle for us Mac people): How to Convert Mac Pages Into Jpegs!

Now you have a whole bunch of jpegs to work with.... time to convert these to a PDF.

Open the file where you saved them. Click Command A to select all the images:


Then open with Preview (which is probably your default):
Note: You won't have the option to open the jpegs IF you are still in iPhoto. You need to drag the pictures into another folder (as the directions at the wikihow link above explains)
I usually create a new folder for each unit I am working on and keep only the Jpegs in there (the original file in Pages and the PDFs we are about to make also have their own folder, but that is up to you.)

Once in Preview open the sidebar (small button on the top). Hit Command A again to select everything.
File and PRINT SELECTED IMAGES (not just Print)
That is the step I didn't know about. I was just hitting print and over and over and over (get the idea!) again my PDF would be only one page long even though I knew I had selected them all. I wanted to SCREAM!

The next road block was that my images sometimes would get turned landscape or portrait without me doing anything! Ahhh! (Maybe that problem shows you that I am not the most tech savvy person... but in case you are like me I am sharing)


From there I had PDF files that were flattened...YAY!!! One last tip: the PDFs may save in a different order than they were as Jpegs, but it is easy to drag them into any order you want when in Preview.

But Michelle at the 3AM teacher says that we haven't added security yet. From here you can follow her steps if you use Adobe..... check out Step 5! {Link Here}

Good luck! If you have any other tips please leave a comment! I'm sure I can learn from you!

2